If any question, contact us https://shaks.channel.io/
[ Index ]
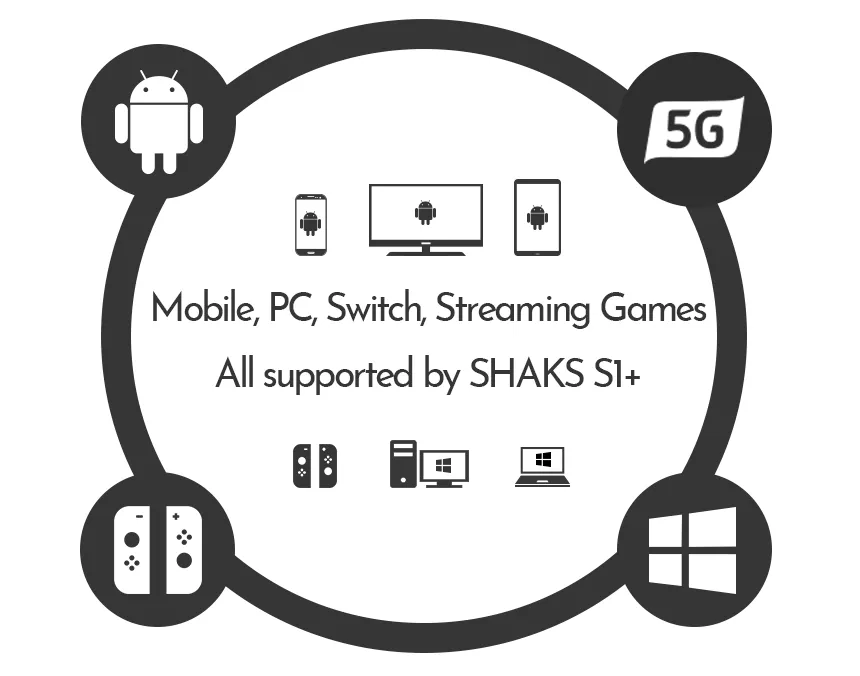
Compatible Device & Service
Thank you very much for using our bluetooth controller, this is our new design. Compatible with PC (Window7,10), Android, iOS 13, Nintendo Switch platform.
Please read this manual carefully before use and keep it for future use!
Button layout & Status indication by LED
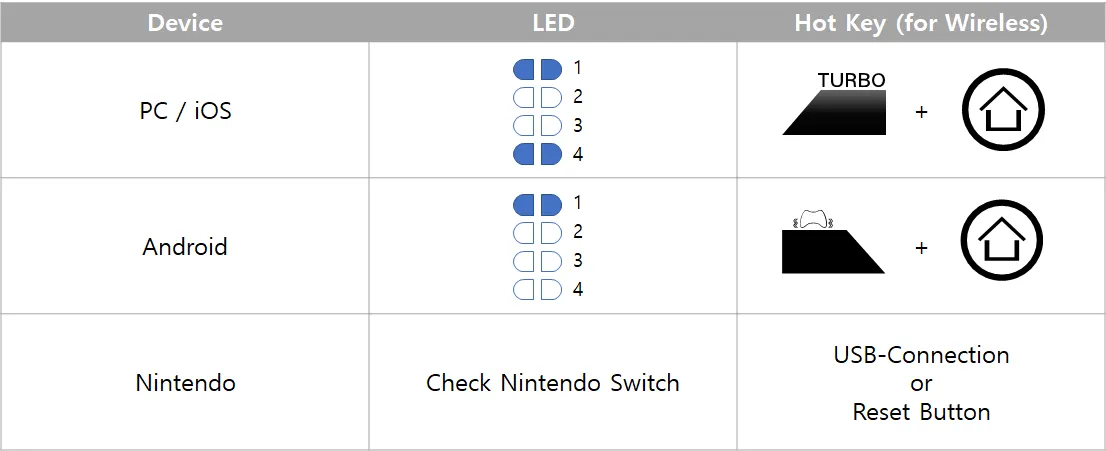
Mode selection according to your device
When the power is on, even if you change the mode, it can not be changed. Please follow the each steps for the correct mode setting.
•
Power off the device,
1.
Select gamepad mode for your device in the table.
2.
Press two hot-keys simultaneously until booting. Press “Hot Keys” for more than 3 seconds
Connect your device
Once you correctly choose the mode, power on
•
Power on: Press 'Power Button' for 3 seconds. When the gamepad is turned on by pressing the 'Power button', the default is Android mode. Change mode according to the above table. And follow step 2 based on the device you wish to connect. After the initial setup is complete, the gamepad will remember your device to connect automatically.
Connecting with an Windows PC/Nintendo Switch (Wired)
Connecting with an Nintendo Switch (Wireless via Bluetooth)
Connecting Android Device (Phone, Tablet, androidTV) by Bluetooth
Connecting iPhone/iPad and Apple TV box by Bluetooth
when using Nintendo Switch
when using Other Platform (Nintendo Switch excluded)
Turbo Setting
게임패드의 A, B, X, Y, LB, RB, LT, RT 총 8개 버튼에서 터보 설정이 가능합니다.
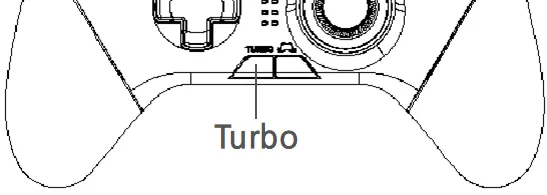
터보 기능을 원하는 버튼을 누른 상태에서 게임패드 하단 왼쪽의 TURBO 버튼을 누르면 설정 됩니다.
터보는 2가지 타입으로 준비되어 있으며 TURBO 버튼을 누를 때마다 모드가 바뀝니다.
•
터보 모드 1: 누르는 동안 터보가 작동합니다.
•
터보 모드 2: 버튼을 1번 눌러서 계속 작동 시키고, 다시 눌렀을 때 해제됩니다.
•
터보 버튼을 3번 누르면 터보 모드가 해제됩니다.
터보 기능이 활성화 된 버튼이 하나라도 있는 경우 게임패드의 원형 LED가 빨간색으로 변경됩니다.
터보 모드를 모두 껐을 때 다시 파란색 LED가 켜집니다.
Vibration Setting
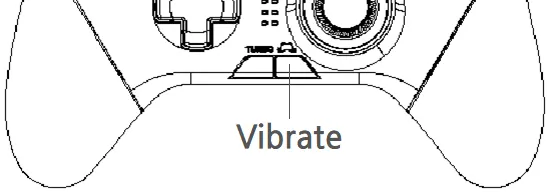
게임패드 하단 오른쪽에 배치된 버튼으로 진동을 0~4단계로 설정할 수 있습니다.
Macro Button Setting
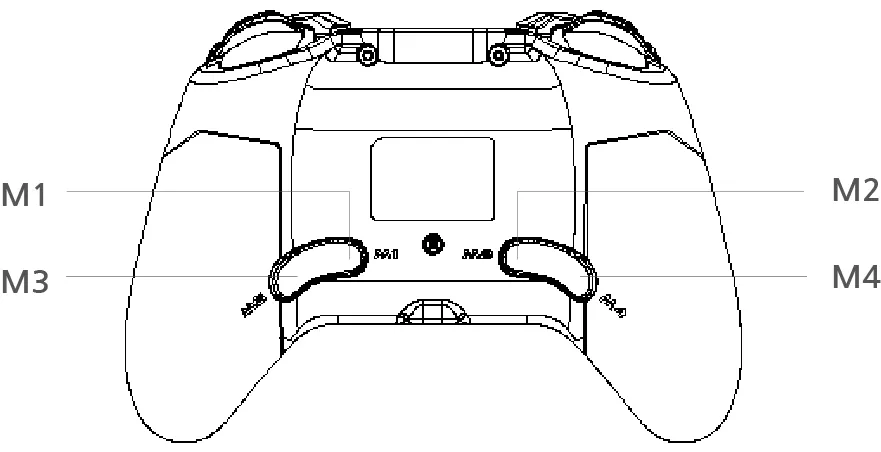
매크로 버튼(M1~M4)은 원하는 여러 버튼 조합을 버튼 하나로 편리하게 누를 수 있도록 하고 있습니다.
기본 값은 아래와 같이 설정되어 있습니다.
M1 - A 버튼, M2 - B 버튼, M3 - X 버튼, M4 - Y 버튼
매크로 설정 방법
1.
설정할 매크로 버튼(M1~M4 중 하나)를 3초 이상 길게 누릅니다.
2.
게임패드의 오른쪽 스틱 LED에 불이 보라색으로 바뀌면 매크로 입력을 시작할 수 있습니다. 원하는 버튼을 눌러 움직여 주십시오.
•
설정 가능한 버튼은 A, B, X, Y, L, R, ZL, ZR, L3(스틱 클릭), R3(스틱 클릭), 방향키에서 사용할 수 있습니다.
•
스틱은 사용할 수 없습니다.
•
첫 버튼을 누를 때부터 누르는 시점(타이밍)도 같이 기록됩니다.
3.
모두 기록하셨으면 매크로 버튼을 다시 눌러 저장합니다.
매크로 기능 활성화/해제
터보 키, (+) 키를 같이 눌러서 매크로 버튼 기능을 사용할 수 없도록 할 수 있습니다. 다시 눌러서 활성화 할 수 있습니다.
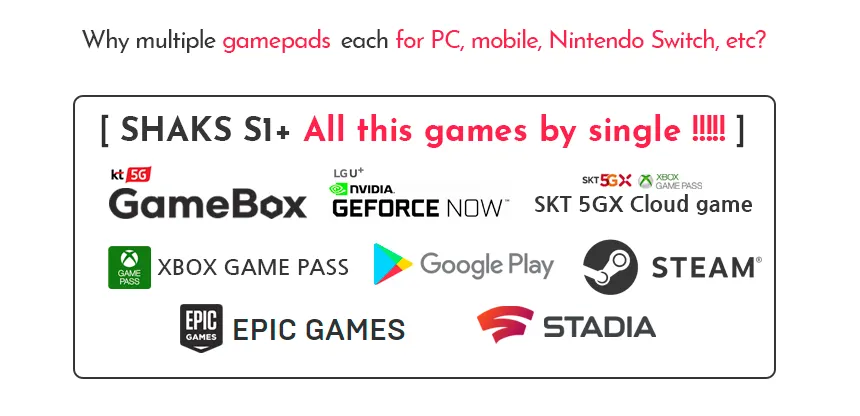
Compatible Gamelist Information
Useful information
For Android
게임패드의 진동 버튼을 눌렀을 때 설정된 최대 강도로 1초 정도 작동합니다.
설정된 진동을 체감해 보신 후 마음에 드는 설정으로 설정하시기 바랍니다.
•
이 제품은 SHAKS 자체 설계 제품이 아닙니다. 샥스 게임허브 앱과 연결하여 사용할 수 없습니다.
•
이 게임패드는 매핑 기능을 지원하지 않습니다. 사용하는 게임이 반드시 컨트롤러를 사용할 수 있는 게임패드인지 꼭 확인해 주시기 바랍니다.
•
For iOS
•
For Windows
•
이 제품은 SHAKS 자체 설계 제품이 아닙니다. 윈도우용 프로그램 SHAKS Utility 를 사용할 수 없습니다.
•
Windows 7 에서 사용할 경우 유선으로 연결하여 사용할 수 있지만, OS의 상태에 따라 Xbox 360 드라이버가 필요할 수 있습니다.
For Nintendo Switch
•
Joy-stick calibration
The gamepad must be turned off to start the calibration.
1.
Press the (-) button + home button to turn on the gamepad.
•
LEDs 1, 2, 3, 4 blink alternately.
•
Do not operate the stick.
2.
Press the (+) button once.
•
Only LED #2 is on.
•
Manipulate the stick by drawing a large circle.
3.
Press the (+) button once.
•
The gamepad turns off after LED 3 turns on once.
4.
Press the power button to turn on the gamepad to confirm your input.
•
If you go to step 3 without operating the stick in step 2, the stick will not work. Please go through the calibration process again.
